TABLE OF CONTENTS
How to Install Recessed LED Lighting to Transform Your Dorm Room?
Hey there, future dorm room decorator! 👋

Ready to transform your basic college cube into the envy of the entire floor? Let's dive into the magic of recessed LED lighting – your secret weapon for creating a space that's both functional and Instagram-worthy. Trust me, by the time we're done, your dorm room will be the talk of the campus (in a good way, of course)!
Picture this: You walk into your dorm room, flip a switch, and boom – the space is bathed in a warm, inviting glow that makes even those cinder block walls look chic. Sounds dreamy, right? Well, with LED recessed LED lighting and some nifty drywall tricks, we can make that dream a reality. And the best part? It's easier than you might think!
Why Bother with Recessed LED Lighting in a Dorm?
Before we dive into the nitty-gritty, let's address the elephant in the room – why should you even bother with recessed LED lighting in a dorm? Well, here's the tea:
- Space-saver extraordinaire: Unlike bulky lamps, recessed lights are practically invisible when not in use.
- Mood maker: Adjustable brightness and color options? Yes, please!
- Energy-efficient: Your wallet (and the planet) will thank you.
- Customizable: Create different zones for studying, chilling, and maybe even a mini dance floor?
Step 1: Planning Your Lighting Layout
Before you start drilling holes (don't worry, we'll get there), you need a game plan. The age-old question of "how many recessed lights do I need?" is about to be answered. Here's a pro tip: measure your room and divide the ceiling height by two. That's roughly how far apart your lights should be. For a standard 12x12 dorm room with 8-foot ceilings, you're looking at about 4-6 lights.
But wait! There's more to consider:
- Task areas: Where will you be hitting the books?
- Accent spots: Got a cool poster or art piece to highlight?
- General ambiance: Think about the overall vibe you're going for.
Step 2: Choosing Your Weapons (I Mean, Lights)
Now for the fun part – shopping! When it comes to LED strips, you've got options, my friend. RGB strips let you switch up colors faster than you change your major, while COB (Chip on Board) strips offer a sleek, uniform light that's perfect for late-night study sessions.
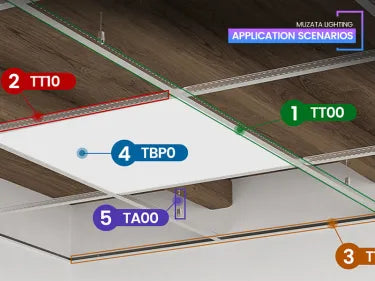
As for the Drywall Aluminum Profiles, these bad boys are the unsung heroes of your lighting setup. They're like the cool, understated friend who makes everyone else look good. They provide a clean, professional finish and help distribute light evenly.
Step 3: The Installation Dance
Alright, it's showtime! Here's where we separate the DIY pros from the... well, let's just say the less handy folks. But don't sweat it – we've got your back.
Mark Your Spots
Start by measuring and marking where your lights will go. Use a pencil and level to ensure everything is lined up perfectly.
Cut the Drywall
Carefully cut holes for your aluminum profiles. (Pro tip: measure twice, cut once!)
Install the Profiles
Secure them in place with drywall screws, making sure they're flush with the ceiling or wall surface.
Wire It Up
Now comes the tricky part – dealing with the wiring.
Safety First: Before handling any wires, ensure the power is completely off. You don’t want any shocking surprises!
-
Assess Your Dorm’s Circuit: Most dorms have limited electrical capacity, so understanding your circuit’s limits is crucial. Check the breaker panel to see how many circuits you have and their capacity. LED strips usually don’t draw much power, but it’s still wise to calculate your total load to avoid overloading the circuit.
-
Choosing the Right Cables: For most LED installations, 18-22 AWG wires should suffice. Go for UL-rated cables, preferably CL2 or higher, which are suitable for in-wall installation.
-
Running the Wires: Plan the route for your cables, avoiding areas that might get damp. Use adhesive cable channels to keep things tidy and to protect your security deposit. Leave some extra length at connection points for adjustments.
-
Making Connections: Use quick connectors or wire nuts to join the wires. Ensure all connections are insulated properly to avoid shorts – electrical tape is handy, but don’t over-rely on it. A good connection is like a good roommate – secure, reliable, and stress-free.
Test and Adjust
Before you start celebrating, make sure everything works. Test each light to ensure it's wired correctly and adjust as necessary.
Pro Tip: If your setup doesn’t light up as expected, use a multimeter to check the connections and voltage. Look for any "hot spots" where wires might be overheating after a few minutes of use.
Step 4: The Final Touch
You've done it! Your dorm room is now lit (literally and figuratively). But why stop there? Consider adding a dimmer switch for ultimate control over your new lighting empire. And for those who really want to flex, smart LED strips can sync with your music or change colors based on your mood. Study mode? Soft white. Party time? Rainbow explosion!
Bringing It All Together: A Dorm Room You’ll Love
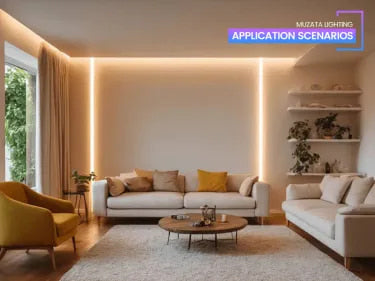
Now that your LED recessed lights are installed, you’ll notice a huge difference in your dorm room. The clean, modern look combined with efficient lighting will make your space feel more open, bright, and inviting. Plus, with the right placement and a bit of creativity, you can create a lighting scheme that’s both functional and stylish.
Imagine your dorm room becoming the envy of your floor, with friends asking where you got your lighting ideas. It’s not just about illuminating your space—it’s about setting the tone for your entire school year. So why not start with lighting that inspires?
So go forth, light up your world, and get ready for a year of "OMG, how did you do that?" from every visitor to your dorm. And when they ask? Just wink and say, "It's all in the lighting, baby."
Now, who’s ready to turn their dorm room into the coolest spot on campus? The spotlight’s on you, future lighting guru! 🌟


